在线考试系统部署文档
主要介绍如何在本地运行项目,包括下载、导入、修改配置、运行项目
环境准备
开发环境:
- jdk:1.8
- MySQL:5.7+
- redis
- rabbitMq
- node.js
- consul
- fastDfs(推荐基于docker安装,安装步骤网上很多)
开发工具:IntelliJ IDEA、WebStorm
项目下载
git clone下载spring-microservice-exam、spring-microservice-exam-ui、spring-microservice-exam-web:1
2
3`git clone https://gitee.com/wells2333/spring-microservice-exam.git`
`git clone https://gitee.com/wells2333/spring-microservice-exam-ui.git`
`git clone https://gitee.com/wells2333/spring-microservice-exam-web.git`
修改配置
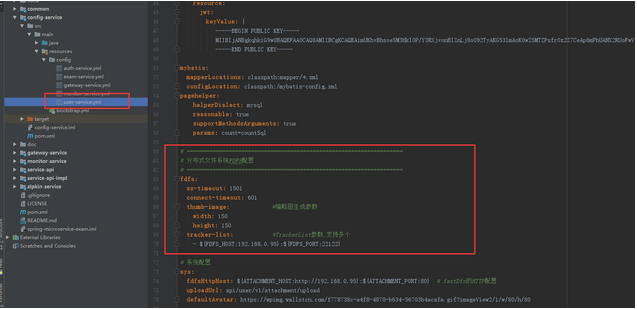
- 修改spring-microservice-exam的config-service的/config文件夹下各服务的配置,主要是数据库、redis和fastDfs,其它配置基本不用动

redis的IP和端口号:

fastDfs的IP和端口号:

- 运行数据库初始化脚本:
1
2
3`/doc/deploy/mysql/microservice-user.sql`
`/doc/deploy/mysql/microservice-exam.sql`
`/doc/deploy/mysql/microservice-auth.sql`
启动后端项目
启动项目前要先确认consul、MySQL、redis、rabbitMq是否已经启动
按顺序启动:
1 | |
内存不足的可以限制每个服务的内存:config-service可以分配64M(-Xmx64m -Xms64m)、其它服务分配128M(-Xmx128m -Xms128m)
启动前端项目
分别在spring-microservice-exam-ui、spring-microservice-exam-web目录下,命令行运行:
1 | |


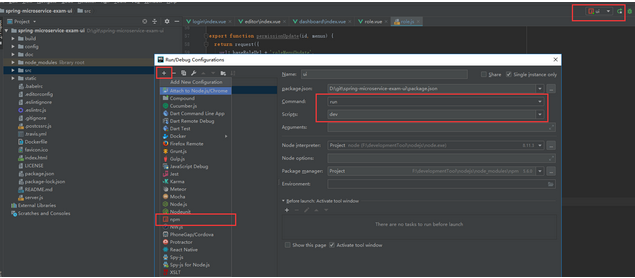
WebStorm导入项目:

运行:

spring-microservice-exam-web项目WebStorm导入操作类似
启动成功后访问:
前台:localhost:8080

后台:localhost:9527
默认账号:
管理员:admin/123456
学生:student/123456
教师:teacher/123456
监控
| 名称 | 地址 |
|---|---|
| rabbitMq监控 | localhost:15672 |
| spring boot admin服务监控 | localhost:8085 |
| zipkin链路跟踪 | localhost:9411 |
| consul | localhost:8500 |
All articles in this blog are licensed under CC BY-NC-SA 4.0 unless stating additionally.
